Bowling Game VR
This Section is dedicated to document my work on this mini bowling Game
1°)Introduction:
For this lab, I adapted the tutorial provided by Wen-Jie Tseng to a bowling game in VR. This section consists of two parts. First, I am going to go through the scene and its elements. Secondly, I am going to explain the scripts that I used for the game.
2°)Scene elements:
a)3d Objects:
I created a scene using unity’s basic 3d objects. I also used a free asset from unity’s store for the ball and the kegels. Down below you can find the final scene and the full hierarchy of 3D objects:
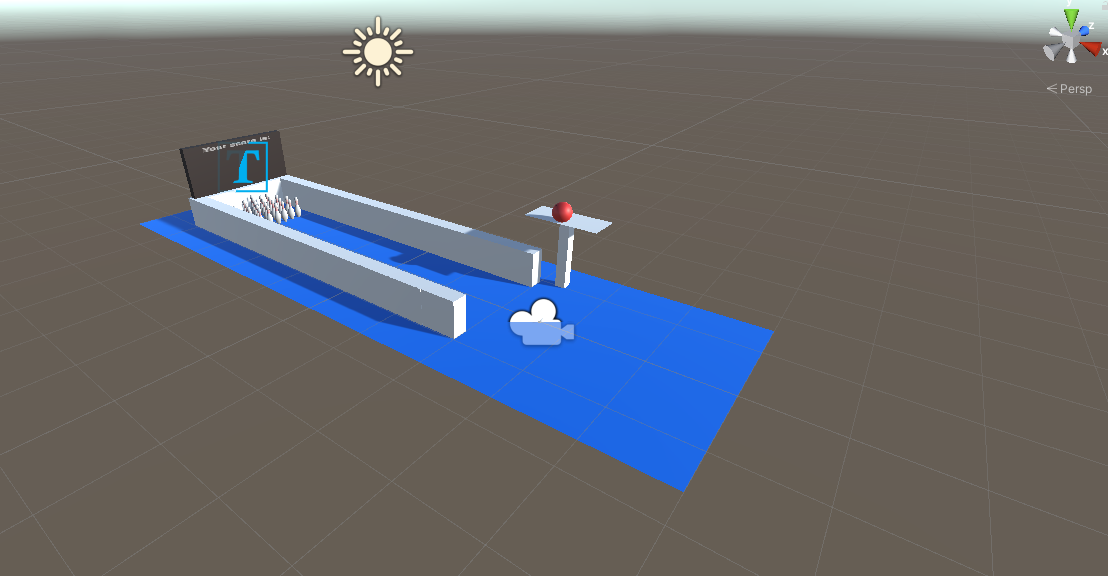
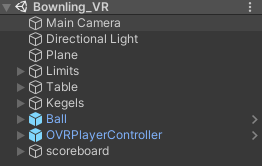
b)The ball:
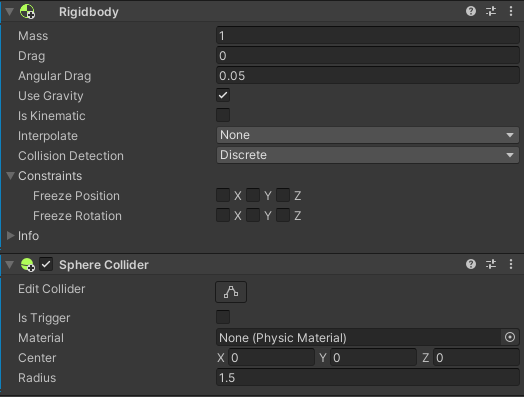
I attached to the ball a sphere collider and a rigid body component. I adjusted the sphere collider to the ball’s size and kept the rigid body component with default parameters.
b)The Kegel:
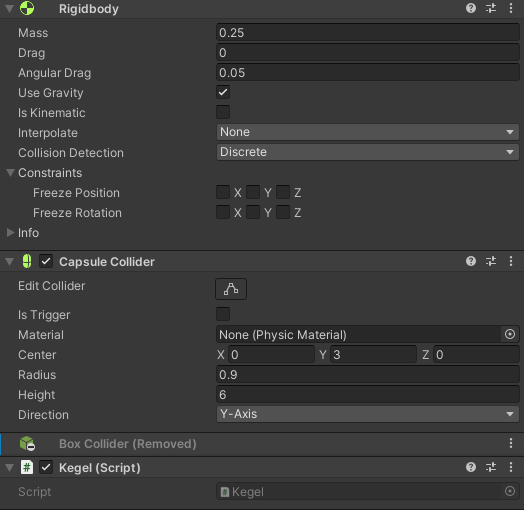
I basically did the same thing for the kegel. Instead of a sphere collider, I fitted a capsule collider along the Y-Axis. I also reduced the mass of the kegel in order to empower the impact of the ball when thrown.
c)Left/Right hand anchor:
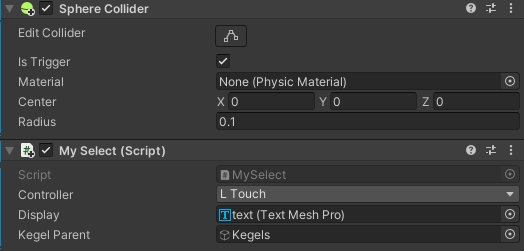
I only attached a sphere collider to the left and right hand anchor.
d)The score:
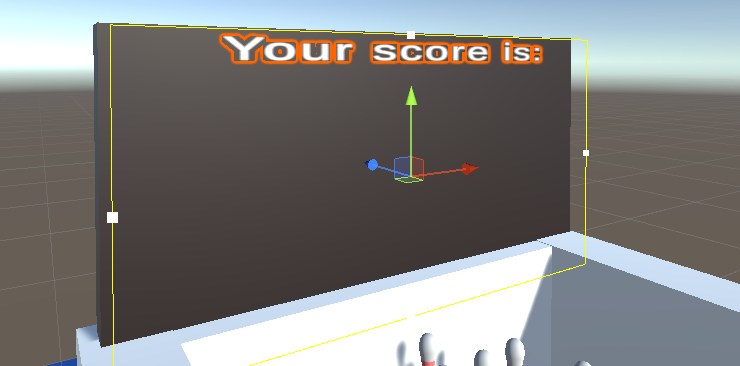
I created a simple Text-Text Mesh pro 3d object and made it the child of the scoreboard 3d object.
e)Collision Matrix and layers of collisions:
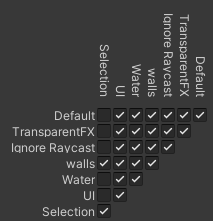
For this scene, I used two layers of collisions: walls and selection. All the static elements like the walls and the table belong to the walls layer. The ball, kegels and the right/hand anchor belong to the selection layer. Here is a snippet of the collision matrix that I used
3°)Scripts and game mechanism:
1°) The selection:
For this part, I mainly followed Wen-Jie Tseng’s tutorial on how to handle the selection.
I did one minor modification, I had to flip some of the coordinates when I transmit the controller velocity to the ball’s one. And also I boosted the value of the speed on the X-Axis. The value of boost is set to 3.0f by default.
triggerValue=OVRInput.Get(OVRInput.Axis1D.PrimaryIndexTrigger, controller);
if (isInCollider)
{
	if (!isSelected && triggerValue > 0.95f)
	{
		isSelected = true;
		selectedObj.transform.parent = this.transform;
		Rigidbody rb = selectedObj.GetComponent();
		rb.isKinematic = true;
		rb.useGravity = false;
		rb.velocity = Vector3.zero;
		//rb.angularVelocity = Vector3.zero;
	}
	else if(isSelected && triggerValue < 0.95f)
	{
		isSelected = false;
		selectedObj.transform.parent=null;
		Rigidbody rb = selectedObj.GetComponent();
		rb.useGravity = true;
		rb.isKinematic = false;
		rb.velocity = new Vector3(-OVRInput.GetLocalControllerVelocity(controller).z*speedBoost, OVRInput.GetLocalControllerVelocity(controller).y, OVRInput.GetLocalControllerVelocity(controller).x);
	}
}
2°) Calculating Score:
In order to calculate the score, I had to fetch the flipped kegels in the scene. In the Awake method of MySelect class I used this method to do so:
listOfKegels = kegelParent.GetComponentsInChildren(); Then for each child of the kegelParent in the update method, I check if it is already flipped or not and whether its euler angles surpass a certain angle threshold. For my case I used 50 degrees.
Here is the code that loops on the kegels:
foreach (Kegel child in listOfKegels)
{
if (((Mathf.Abs(child.transform.localEulerAngles.x) > 50) ||(Mathf.Abs(child.transform.localEulerAngles.z) >50)) && (child.gameObject.activeSelf) && (child.transform.childCount==1) && (!(child.isFlipped())))
	{

	child.flip();
	score = score + 1;
	display.text ="Your score is : "+ score.ToString();

	}
}
I added the condition child.transform.childCount==1 because the prefab that I downloaded had a parent and one child and the “GetComponentsInChildren” method fetches every child of the initial parent. I had to make sure that I fetched the same number of existing kegels in order to calculate the score correctly.
3°) The "Kegel" & "ResetBall" classes:
These two classes will be used for resetting the game. The player can reset only the ball by pressing on the X button of the oculus’ right controller. And if he also wants to reset the kegels, he has to simultaneously press both of the X buttons of the two controllers. Here is a usefull link on how to use the buttons in the script: link
Here is the full code of the two classes: Kegel.cs:
public class Kegel : MonoBehaviour
{
    // Start is called before the first frame update
    private Vector3 initialPosition;
    private Quaternion rotation;
    private bool flipped;
    void Start()
    {
        initialPosition = transform.position;
        rotation = transform.rotation;
    }

    // Update is called once per frame
    void Update()
    {
        if ((OVRInput.GetDown(OVRInput.Button.One)) && (OVRInput.GetDown(OVRInput.Button.Three)))
        {
            transform.position = initialPosition;
            transform.rotation = rotation;
            Rigidbody rb = GetComponent();
            rb.velocity = Vector3.zero;
            rb.angularVelocity = Vector3.zero;
            flipped = false;
        }
    }

    public void flip()
    {
        flipped = true;
    }

    public bool isFlipped()
    {
        return flipped;
    }

}
ResetBall.cs:
using System.Collections;
using System.Collections.Generic;
using UnityEngine;

public class ResetBall : MonoBehaviour
{
	// Start is called before the first frame update
	private Vector3 initialPosition;
	private Rigidbody rb;

	void Start()
	{
		initialPosition = transform.position;
		rb =GetComponent < Rigidbody>();
	}

	// Update is called once per frame
	void Update()
	{
		if(OVRInput.GetDown(OVRInput.Button.One) && (rb.velocity.magnitude < 0.2)){
			transform.position = initialPosition;
			rb.velocity = Vector3.zero;
		}
		if (transform.position.y < 0)
		{

			rb.velocity = Vector3.zero;
			rb.angularVelocity = Vector3.zero;
			transform.position = initialPosition;
		}
	}

}
3°)Final Demo :
I will leave here a final demo of my mini game: